Elphinstone Reef
Elphinstone Reef lies approximately 30km north of Marsa Alam, 15km offshore in the southern Red Sea. It is a narrow, cigar-shaped reef roughly 350m long, oriented north to south, rising steeply from the sea floor to just below the surface.
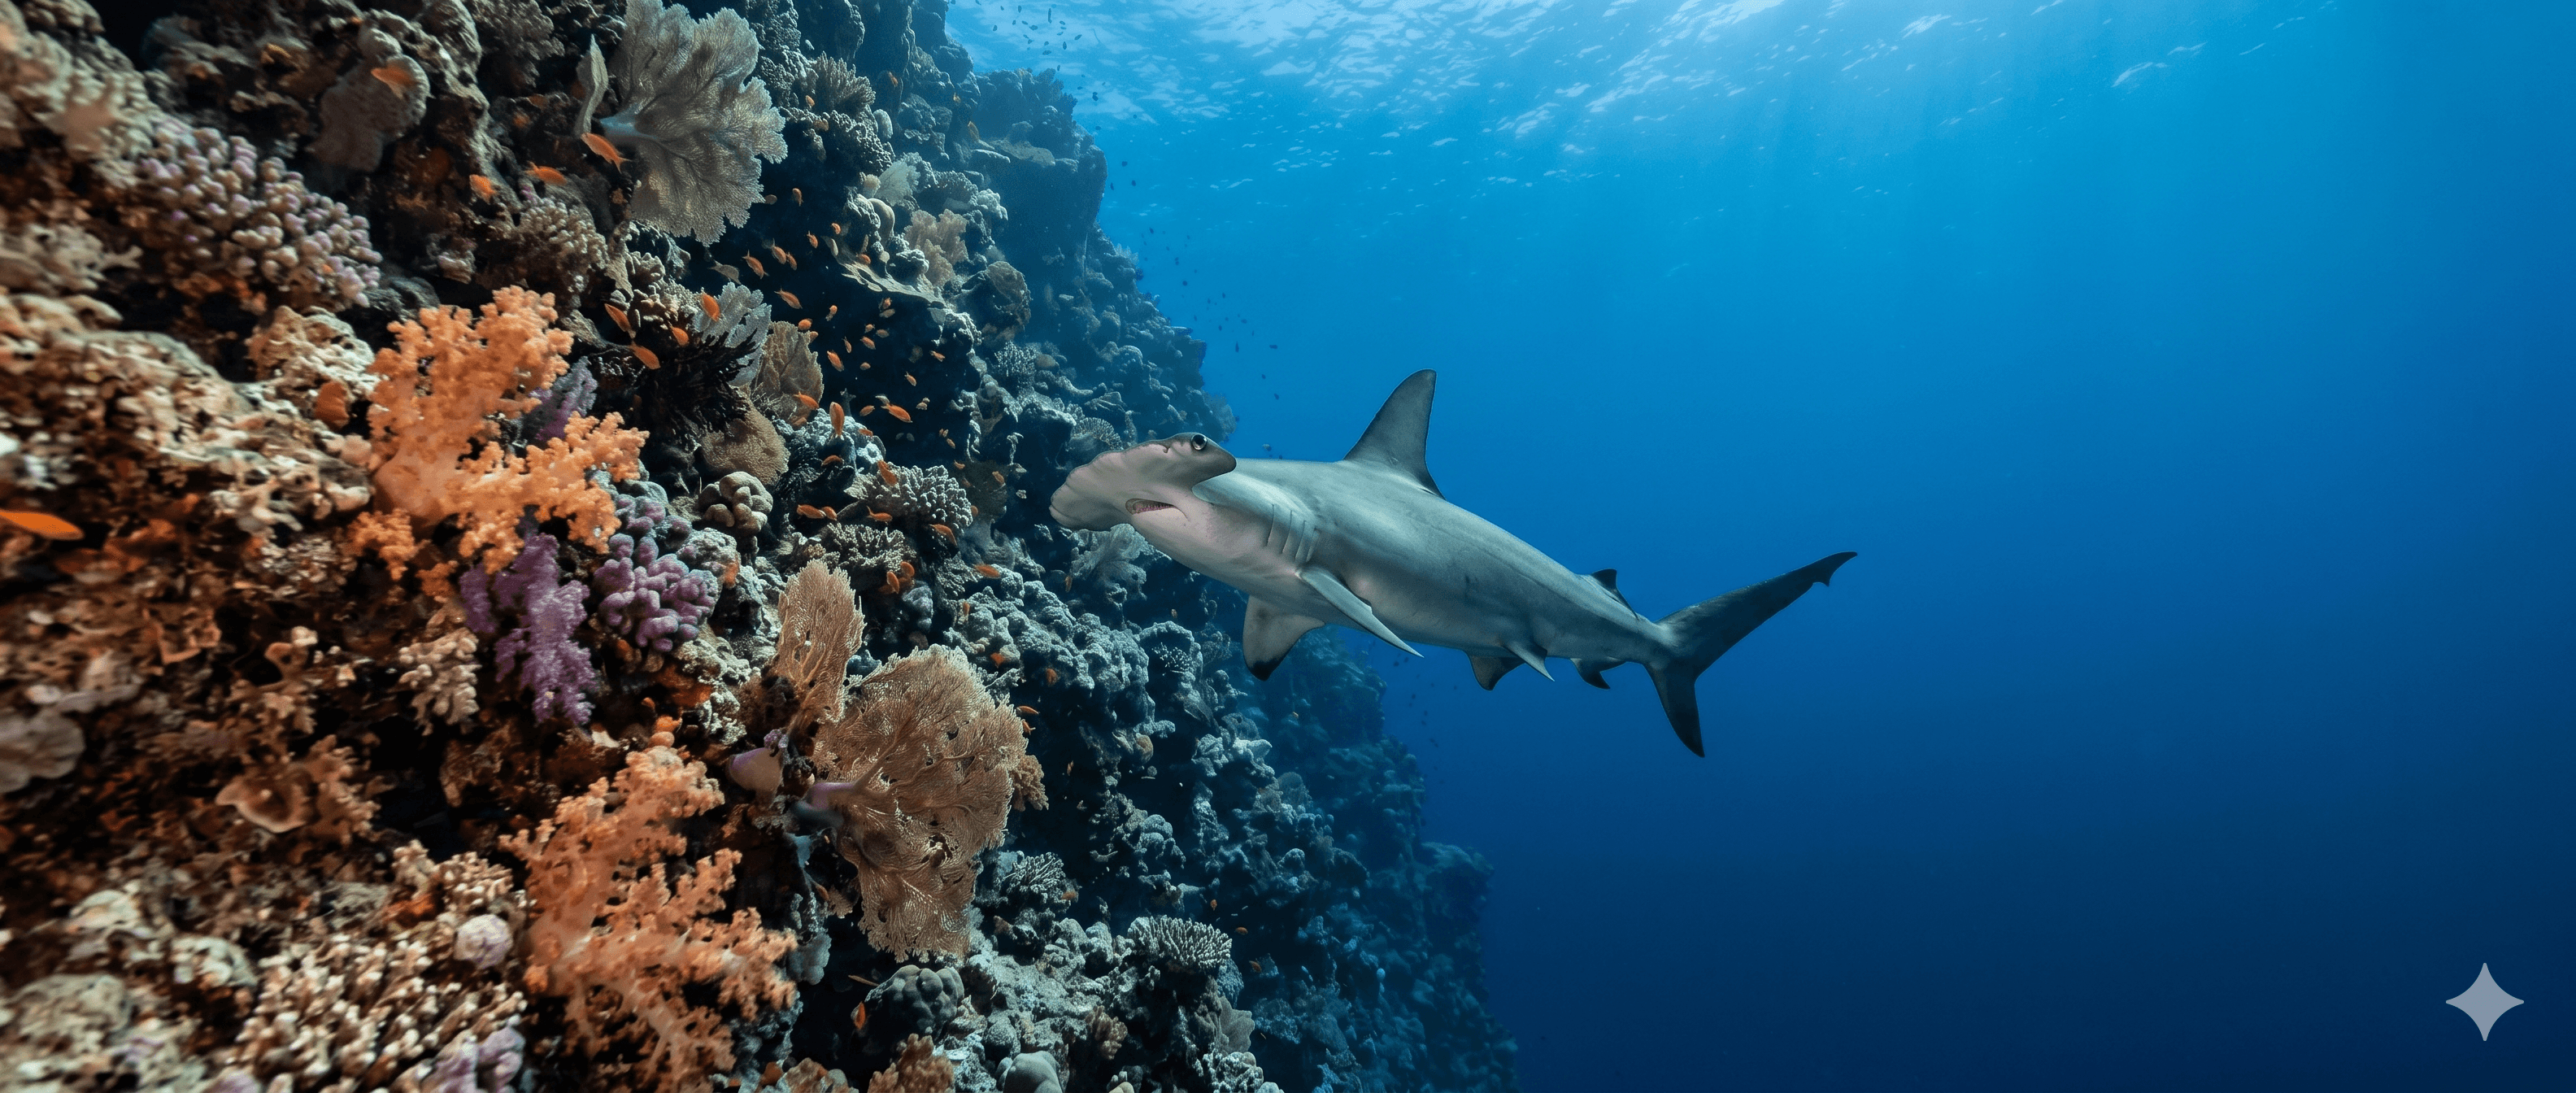
The reef has three distinct areas. The south plateau, the more famous, sits at around 18–22m, a wide shelf of soft coral and gorgonian fans that drops sheer on both the east and west sides to beyond 100m. This is one of the most reliable sites in the Red Sea for oceanic whitetip sharks: year-round residents that appear from the blue and work the plateau at close range, particularly in the morning before the day boats arrive. Peak season runs September to November, when multiple animals can be present simultaneously. At the very southern tip sits the Elphinstone Arch, a tunnel connecting the east and west walls at around 50m depth. It is a technical dive in every sense: you need to descend to 50m just to see it. Recreational divers do not dive the arch.
The north plateau sits at around 25–30m, broader and less current-swept than the south, with good soft coral coverage on both walls. The defining feature here is the crack: a fissure in the reef floor at around 30m that opens onto a third plateau some 20m below. Hovering above it is one of the most distinctive moments in Red Sea diving, like looking out from a balcony into open blue, with the structure falling away beneath you. Going through the crack and descending to the third plateau is below 30m and is a technical dive; recreational divers stay above and look down.
The east and west walls run the full length of the reef, covered in soft coral, sea fans and gorgonians from the surface to well beyond recreational depth. Both walls are diveable as drifts, current tends to run north to south, making the east wall the more sheltered option in heavy current. Unlike Daedalus and the Brothers, Elphinstone is accessible as a day trip from Marsa Alam. Most liveaboards covering the southern Red Sea include it on route.
Moor on the south and descend quickly to the plateau at 18–22m. The OWTs appear from the blue, sometimes immediately, sometimes after ten minutes of stillness. Hold your position, maintain a tight group, no sudden movements. Morning dives before 9am give you the site before the day boats arrive. When bottom time allows, drift along the east or west wall before ascending.
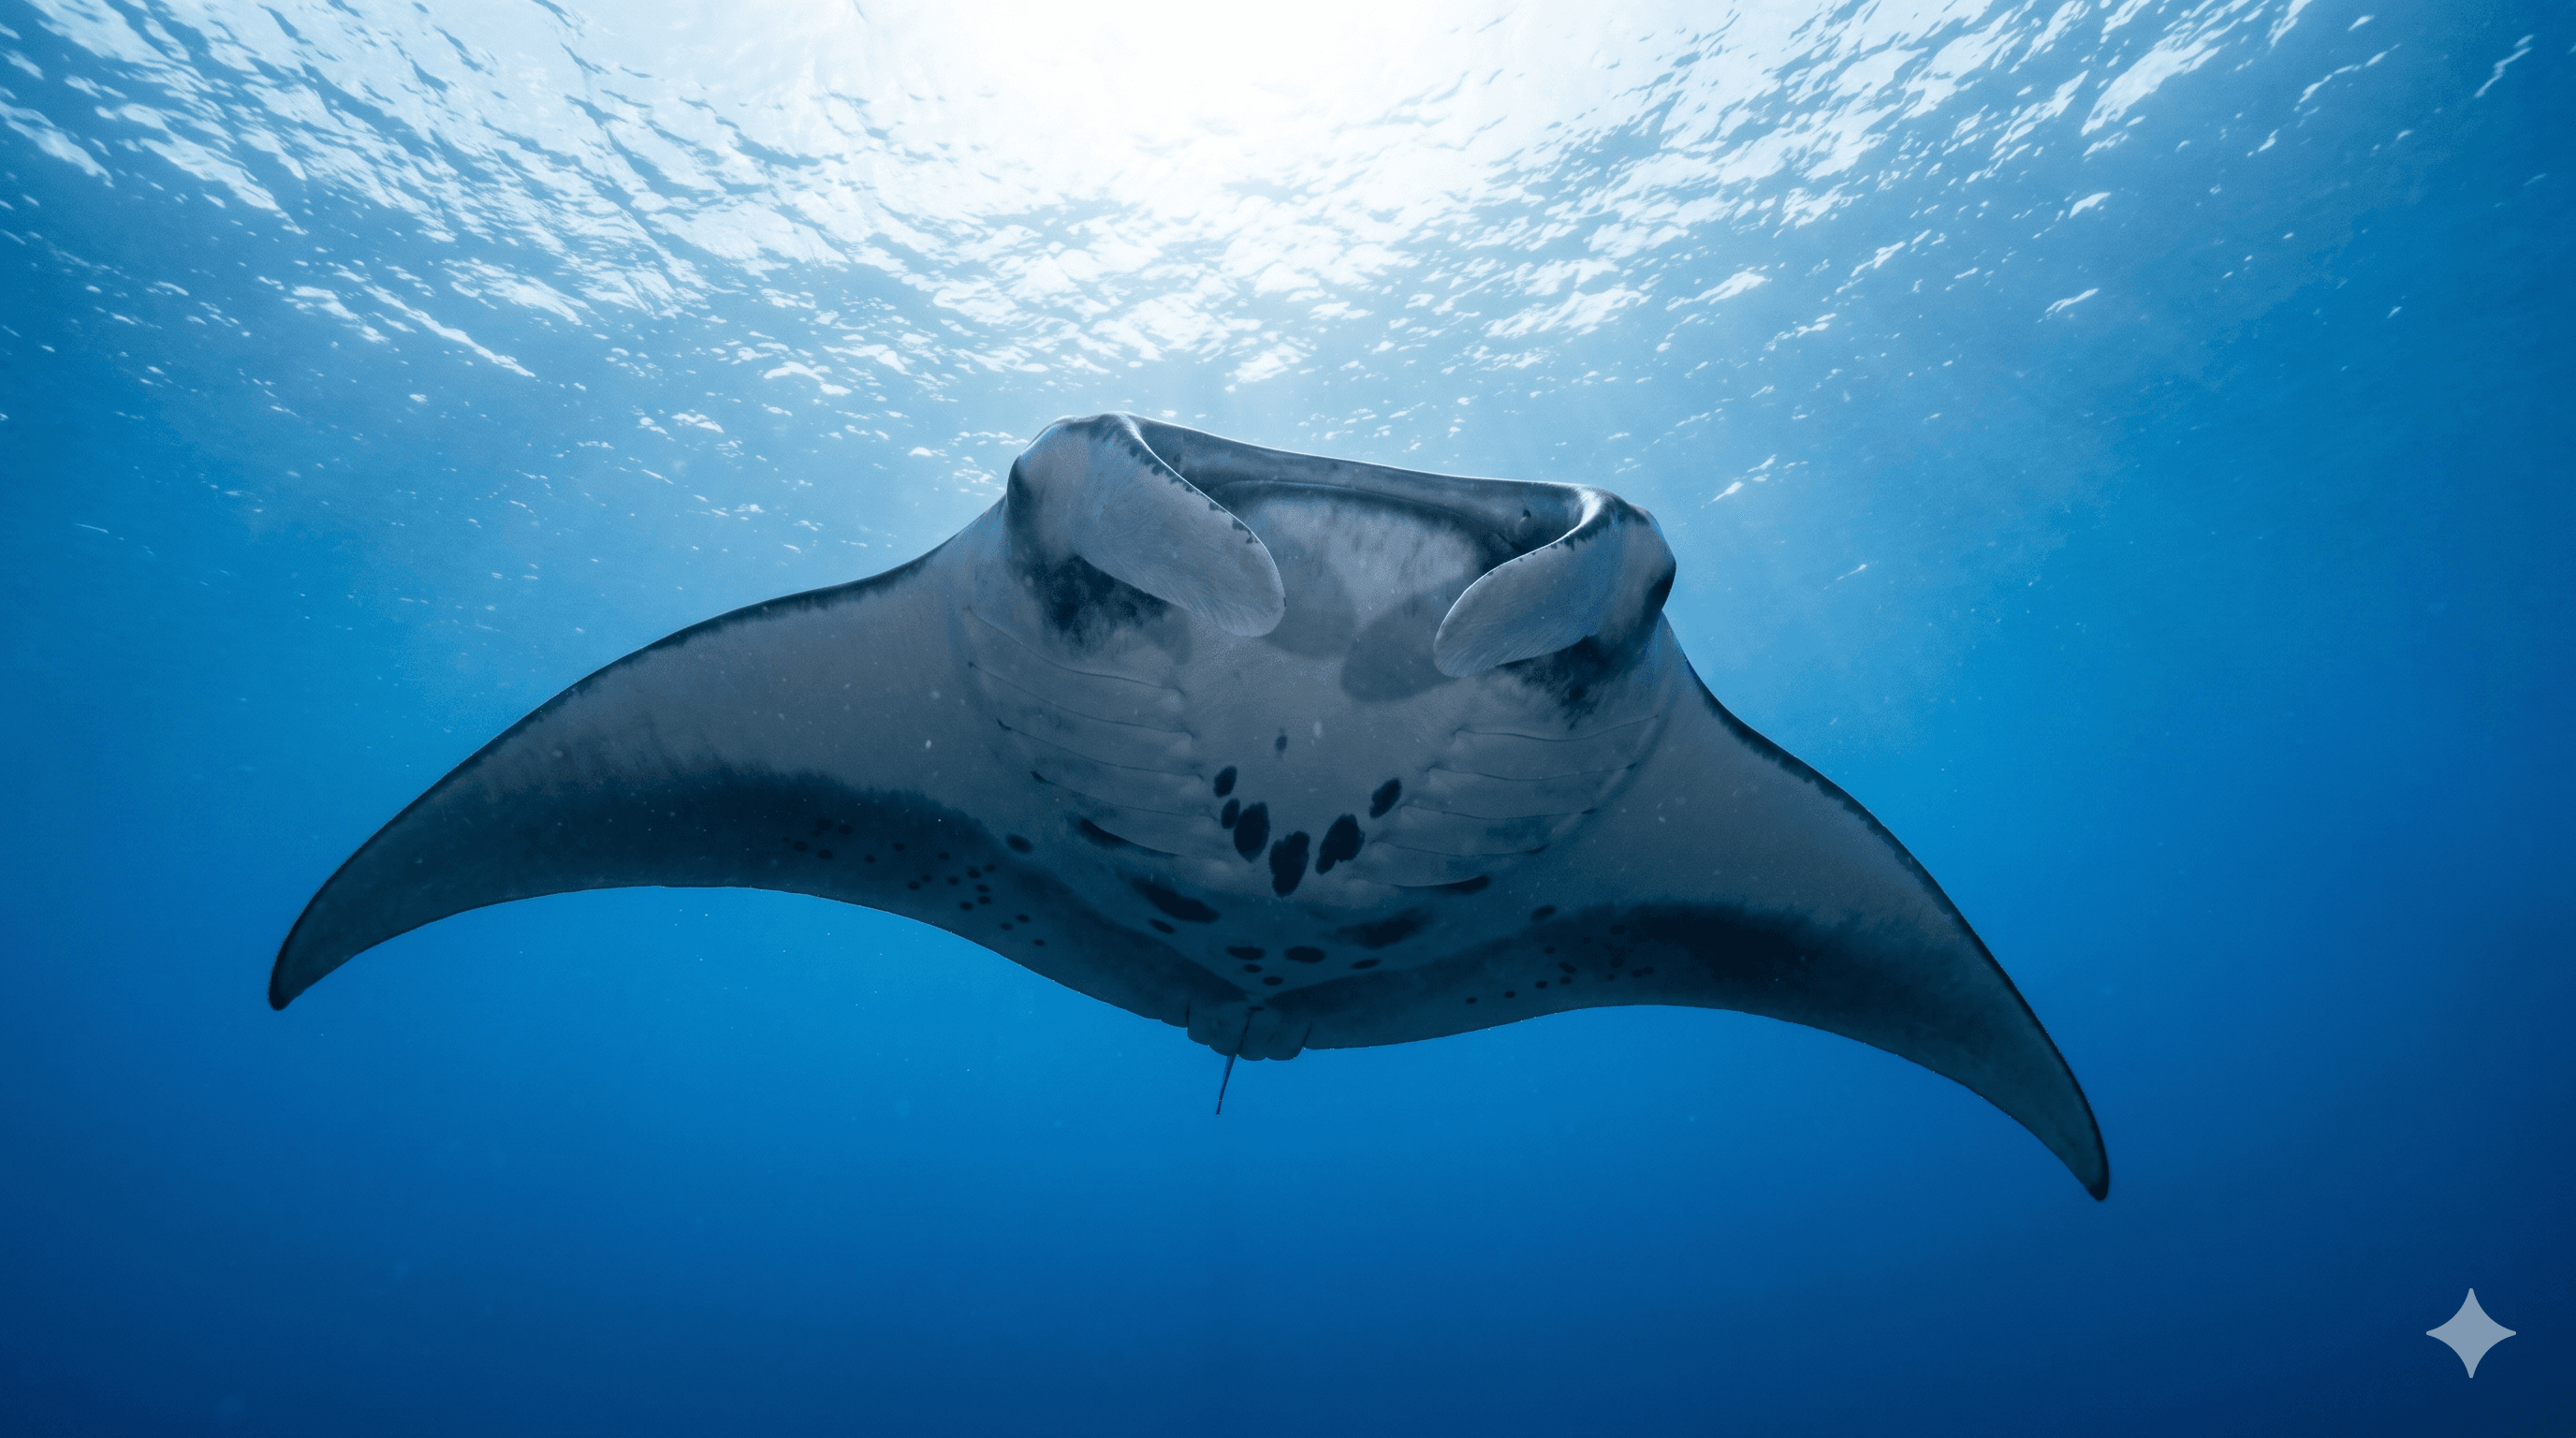
Drop north of the main reef, aiming to land above the crack or slightly south of it, this way you see the plateau open up beneath you as you descend. Spend most of the dive at around 30m, hovering above the crack. It opens onto a third plateau some 20m below, like looking out from a balcony into the blue. Keep your eyes on that open water: hammerheads, silky sharks and grey reefs work this depth, and if the season is right you may get a manta or a whale shark drifting through below you. Stay above 30m; descending through the crack to the third plateau is a technical dive only. When bottom time calls, swim back north to the main reef and take either wall back to the mooring, east or west depending on the sun and time of day. Do not attempt this dive if the current is running south to north. The normal current runs north to south; if it reverses you will not be able to swim back to the main reef. You will be forced to ascend early, leaving the plateau behind as it disappears beneath you, and will surface in open water.
The arch sits at around 50m at the southern tip of the reef. You need to descend to 50m just to see it, this is a technical dive. Not for recreational divers. The current around the southern tip is strong and the wall drops away fast. Technical divers should plan a dedicated dive for the arch with a separate entry and zodiac pickup. There is a local legend that a pharaoh's sarcophagus lies beneath the arch, the story goes that a coral-encrusted mass of distinctly rectangular shape rests on the floor below it. No one has confirmed it. No one has ruled it out. The arch is deep enough that the mystery stays intact.
The numbers
What you need to know
Access & operators
Know the reef before you dive it
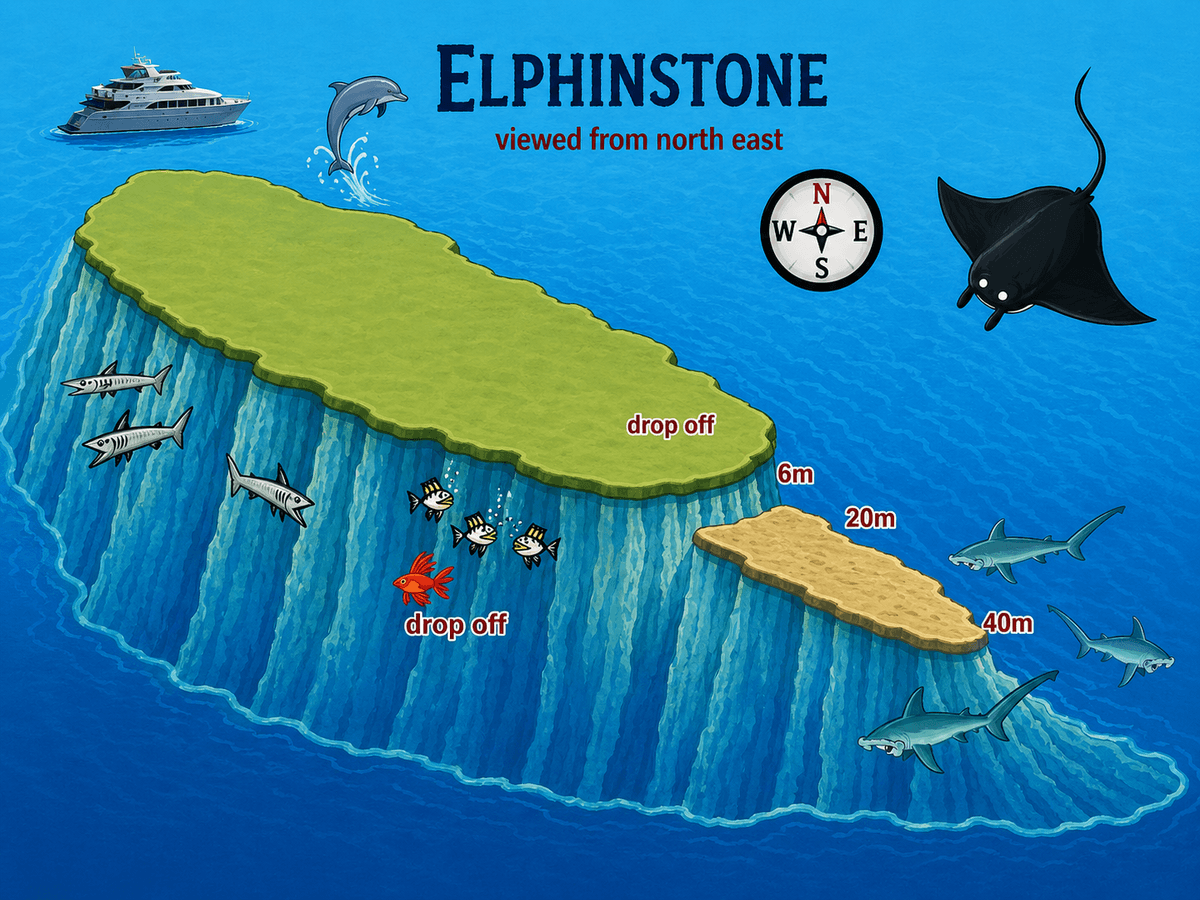
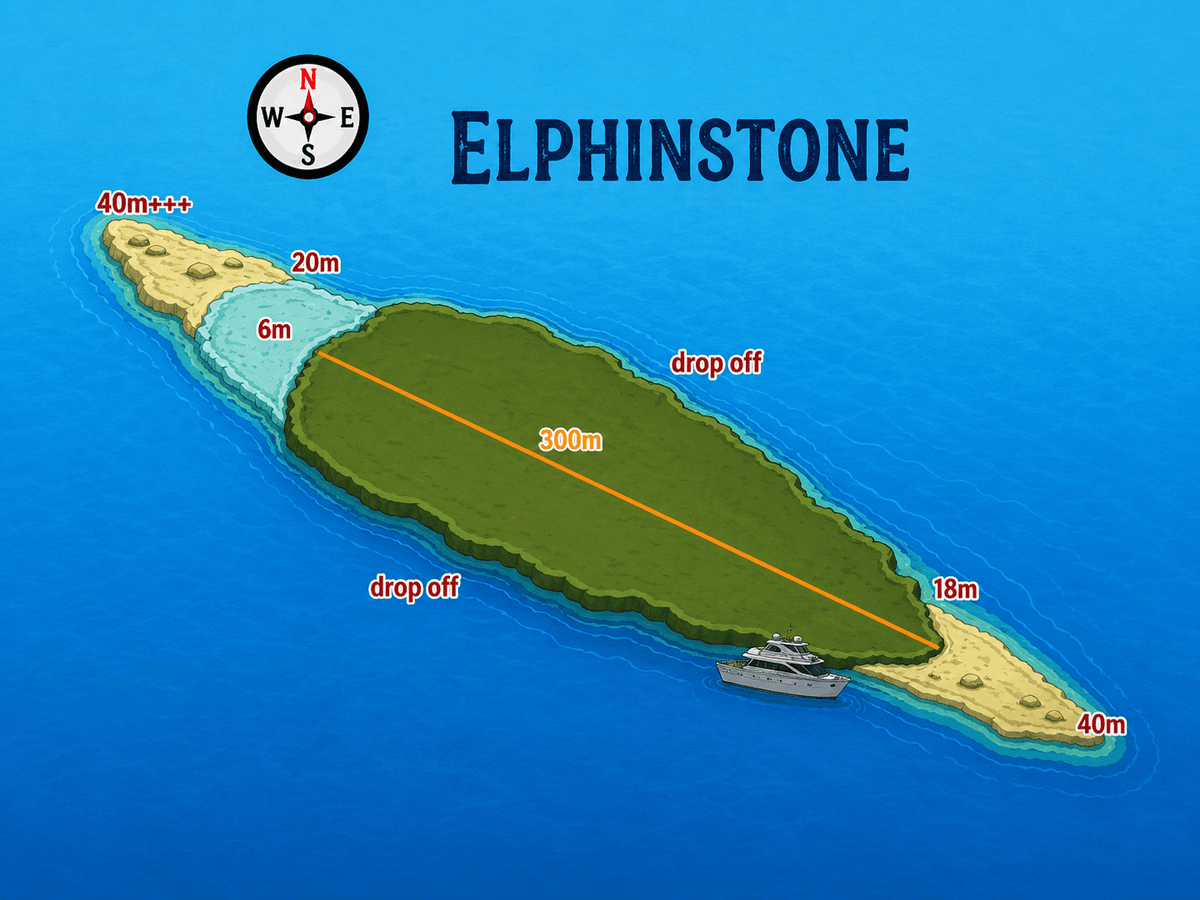
Original maps created for The Red Sea Atlas · Not for navigation
What you might encounter


Shot at Elphinstone Reef
Keep reading, and open the whole Atlas.
A free account unlocks every dive site guide and map, the marine life library, member reports, and the full incident log. Free to join, always.
Join free to keep readingDiver Comments
Share your experience, conditions report or tips about Elphinstone Reef.
No comments yet, be the first to share your experience.